




Sheet Metal Edge Deburring Methods: How to Reduce Rework on Painted Parts
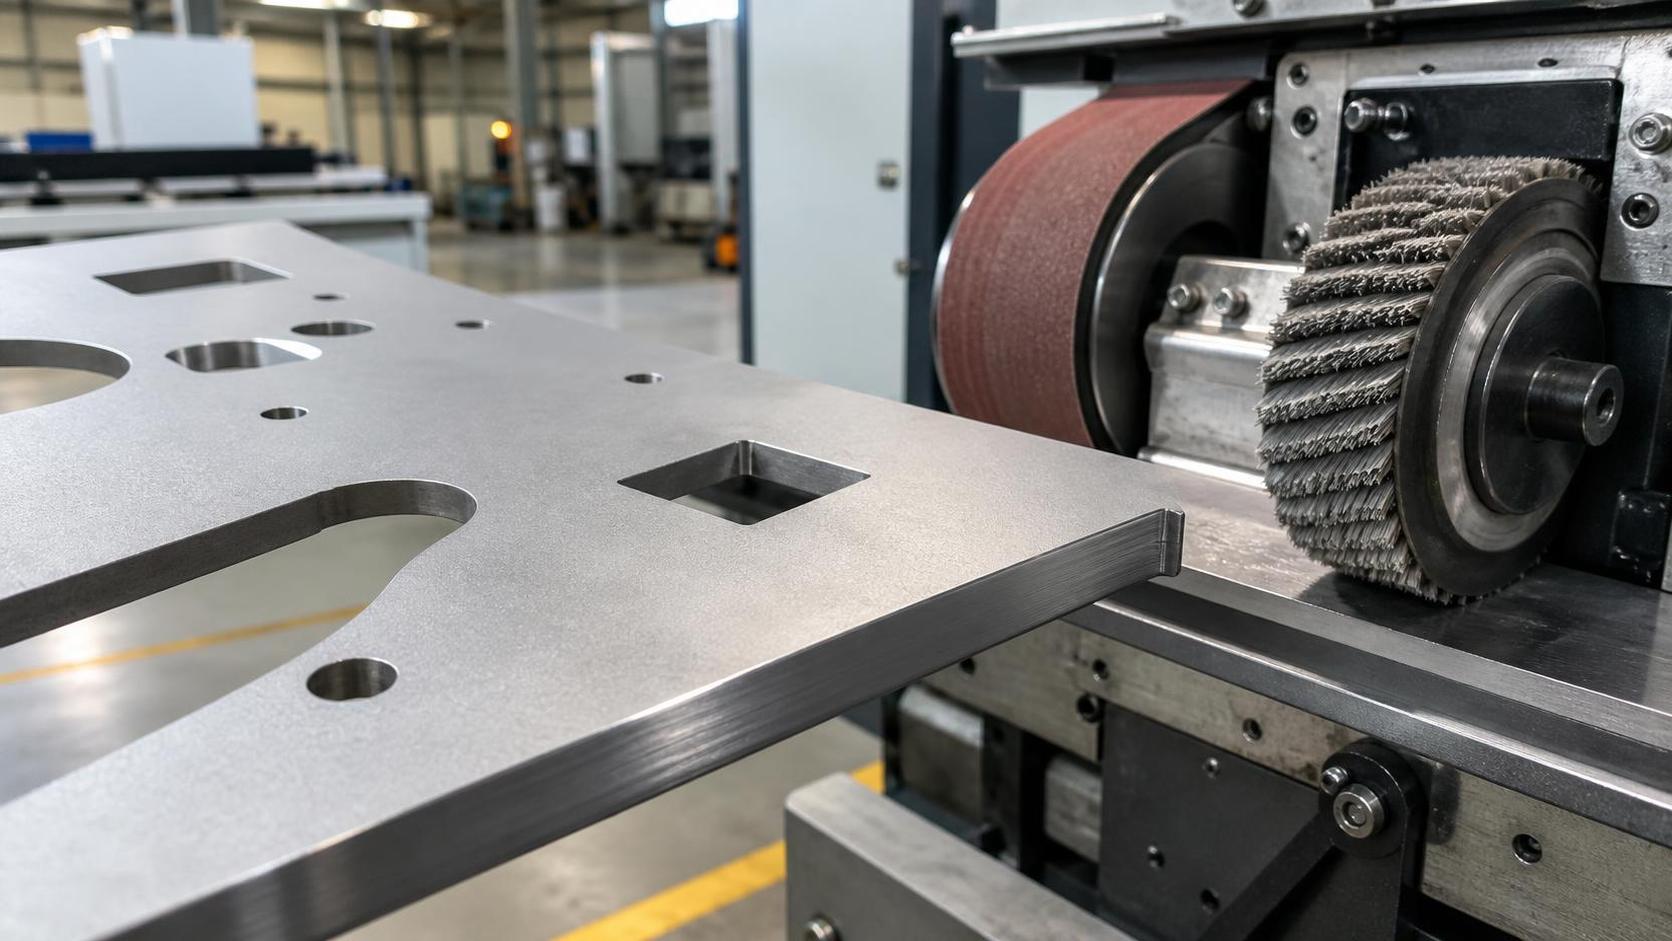
Paint rework on sheet metal parts often begins at the cut edge. A coating line may appear stable, yet chips at corners, thin paint on sharp edges, and visible roughness after curing usually point back to incomplete burr removal. In practice, sheet metal edge deburring is not only about making a part safer to handle. It directly affects paint wetting, edge coverage, pretreatment drainage, film build consistency, and the amount of manual correction required after inspection.
Edges created by laser, plasma, flame, turret punching, shearing, or stamping do not fail in the same way. A fine laser burr on stainless steel behaves differently from the hard oxide and dross left by thermal cutting on carbon steel. Aluminum may show smeared edges instead of a heavy burr, while punched holes can produce rollover on one side and breakout on the other. If all these conditions are sent to the same deburring station with one setting, the painted result usually becomes unpredictable.
Where painted parts usually start going wrong
The most common problem is the sharp edge itself. Paint naturally pulls away from knife-like corners during application and curing, leaving a thinner film at the point most likely to be damaged in packing, transport, or assembly. If a burr remains attached, it can break off later and leave a visible crater. Even when the burr does not detach, it may shadow the spray path, trap pretreatment chemistry, or create a raised line that becomes obvious under gloss or powder topcoat.
Another frequent issue is assuming that a smooth face means a clean edge. Flat surfaces can look acceptable after cutting, especially on thin sheet, while the edge still carries micro-burrs, oxide scale, or slag adhesion. These defects are small enough to escape a quick visual review but large enough to interfere with paint holdout. Rework then appears later as edge rusting, touch-up on corners, or repeated sanding before repainting.
Match the deburring method to the burr type
Mechanical belt deburring is often the first choice for flat parts with continuous outer profiles. It removes light burrs quickly and can also soften the edge radius when the abrasive sequence is selected correctly. This method works well on carbon steel, stainless steel, and aluminum sheet when burr height is moderate and the part can be supported steadily through the machine. It is less effective if heavy dross remains after poor cutting conditions, because the belt then spends too much time attacking isolated hard spots and too little time producing an even edge.
Brush deburring is useful when holes, slots, inner contours, and mixed geometry need more uniform contact. Cross-belt and rotary brush systems can break edges without changing overall dimensions too aggressively. For painted parts, that matters because the goal is usually controlled edge rounding rather than material removal for fit. A small, repeatable radius generally gives better coating behavior than a sharp edge polished to a visually bright finish.
Vibratory deburring can work for small batch parts or dense quantities of small components, especially where all edges need to be softened at once. However, it is highly dependent on media choice, load condition, and part geometry. Large flat panels, delicate bends, or parts with cosmetic face requirements may be damaged by contact between parts during the cycle. If painted appearance is critical on exposed surfaces, vibratory finishing should be validated carefully rather than assumed safe because it removes burrs.
Manual grinding and flap wheel work still has a place, mainly for local correction of heavy burrs, weld spatter, or isolated dross after cutting. The problem is variation. One operator may create a clean radius, another may gouge the face near the edge, and another may leave heat tint or directional scratches that show through coating. Manual work becomes expensive not only because of labor time but because it makes edge condition harder to standardize before paint.
Thermal cutting quality decides how much deburring is really needed
Many deburring problems are actually cutting problems in disguise. If plasma parameters are poorly matched to material thickness, the resulting burr can become too tenacious for efficient downstream removal. Torch height, travel speed, gas selection, consumable wear, and nesting strategy all influence the burden placed on the deburring stage. A cleaner cut edge shortens abrasive time, reduces media wear, and lowers the chance of over-rounding thin parts.
For shops processing conductive metals in varied thickness ranges, cutting equipment configuration can change the whole economics of sheet metal edge deburring. A setup such as Gantry CNC plasma cutting machine is relevant in this context because plasma cutting thickness, arc voltage height control, travel speed up to 6000mm/min, and even underwater cutting options can affect dross formation, heat-affected zone size, and edge cleanliness before the part ever reaches sanding or brushing. That does not remove the need for deburring, but it can make the difference between light edge conditioning and repeated rework on every batch.
Edge radius matters more than mirror finish
On parts intended for painting, a lightly rounded edge is usually more valuable than an overly polished one. Paint adheres to both, but coverage at the edge is more stable when the coating can wrap around a softened contour. Shops sometimes chase a bright metal look and still get failures because the edge remains too sharp. The practical target is consistent break-edge geometry, not cosmetic shine before coating.
This is especially important on laser-cut thin sheet and punched parts. The burr may be low, so the temptation is to skip deburring altogether. Yet the problem after paint is often not obvious roughness but fragile film build on the edge. A controlled edge break on thin material can reduce chipped corners during handling between pretreatment, coating, curing, packing, and final installation.
Material-specific points that are easy to overlook
Carbon steel often carries oxide and thermal residue that should be removed along with the burr. If the edge is only smoothed mechanically while oxide remains bonded, paint may later lose grip at that boundary. Stainless steel presents a different risk: abrasive contamination from carbon steel processing can affect surface condition, so separation of abrasive consumables may be necessary where finish quality is sensitive. Aluminum tends to load abrasives quickly, and smeared edges can look acceptable while still interfering with a clean paint line. Copper, titanium, and nickel alloys may require slower, more controlled deburring to avoid edge deformation or unnecessary stock loss on thin sections.
Mixed-material production creates another problem. A deburring setting that works on 3mm carbon steel may be too aggressive for thin aluminum covers processed in the same shift. When one machine is shared across materials, changeover discipline matters: abrasive wear state, contact pressure, feed speed, and dust extraction condition all influence the final edge.
Process details that reduce rework without adding complexity
- Separate heavy burr removal from final edge conditioning. If thick dross is present, remove it first with a method suited to localized hard buildup, then send the part through a calibrated deburring pass for uniform edge quality.
- Inspect both the outer profile and internal features. Paint failures frequently start at slots, pierced holes, and tabs where the deburring tool had limited access.
- Review edge condition before pretreatment, not after primer. Once coating begins, the line tends to compensate for a metal preparation problem that should have been solved earlier.
- Control part orientation during machine deburring. Thin parts that chatter or lift may show alternating edge quality from one section to another.
- Keep abrasive wear visible in the process record. A worn belt or brush may still remove obvious burrs while no longer creating the edge radius needed for coating consistency.
Common misjudgments on the shop floor
One misjudgment is treating all burrs as a height issue. Burr hardness, attachment strength, and edge sharpness can matter more than height alone. Another is relying on glove feel as the only acceptance standard. A part can feel safe to touch and still be poor for paint, especially with micro-serrations on cut edges. There is also a tendency to focus on visible exterior edges and ignore concealed flanges, mounting holes, and mating tabs. Those areas may not be seen after assembly, but they are often where corrosion starts if paint coverage is weak.
Some lines also compensate for poor deburring by increasing paint thickness. That may hide texture for a while, but it does not solve sharp-edge film pullback, and it can introduce its own issues such as uneven cure, bridging around small features, or cosmetic mismatch between broad faces and narrow edges.
Deburring has to stay connected to upstream and downstream steps
Purchasing a deburring machine or changing abrasive grade without reviewing cutting quality, pretreatment chemistry, and packaging method rarely fixes the real problem. Parts that leave cutting with severe dross may need process correction upstream. Parts that leave paint in good condition but chip during transport may need edge improvement plus better stacking protection. Installation damage on painted brackets is often blamed on handling, although the root cause was a sharp edge with thin coating that had little resistance from the start.
Transport and internal movement deserve attention when evaluating results. A part may pass visual inspection immediately after curing, then fail after bin transfer or pallet strapping. That sequence usually indicates the edge is still too acute, even if burr removal looked acceptable. The right test is not only whether the burr is gone, but whether the finished edge survives normal movement through the plant.
When to adjust the method instead of the setting
If cycle time keeps increasing while edge quality remains inconsistent, the current method may simply be wrong for the part family. Wide flat panels with external profiles often justify belt-based processing. Dense nests of smaller pieces with slots and perforations may respond better to brush systems. Parts cut with heavy thermal residue may need upstream cutting optimization before any deburring machine can perform economically. Pushing one method beyond its natural range usually leads to unstable paint results and repeated manual correction.
Good sheet metal edge deburring is quiet in the final product. The paint line stops fighting sharp corners, touch-up work drops because the root defect is gone, and parts move through handling with fewer visible edge failures. When rework keeps returning on painted parts, the edge condition is one of the first places worth examining closely.
search
Products Navigation
Send Us A Message